Thursday, March 15, 2012

Girly Dinosaur Party

Pin It

First, let me give credit where credit is due! My dear sweet friend agreed to take photos of the party so all of these beautiful shots are due to Beth York Photography. Please take a moment to check her out on Facebook. She does AMAZING work and her photography business is strictly an effort to bring home their darling daughter from China. Even if you aren't local and can not take advantage of her photography skills for your family, please take a moment to visit her blog, read her inspiring stories, and consider supporting them through their 31 fundraiser that is going on this month. You will be truly humbled and blessed by this precious family's testimony!

In our family we don't go overboard with birthday presents but instead this creative mama probably goes a bit overboard with parties. I am so thankful that I have a husband who understands my need to be creative and supports me in that. I will admit, that a lot of what I do is for fun, but while working hard on this particular party, I was convicted about my motives. It scared me to think that it might be for my own glory and not for my little girl or for the friends we were inviting. After searching my heart, I truly feel that most of my efforts were with the children in mind.


When I began her party planning, there wasn't much question about what the theme would be. This girl LOVES dinosaurs! She knows the different names better than anyone I know and can tell whether they are herbivores, carnivores or omnivores. She can tell you whether they are bipeds or quadrupeds and what a track wave is and can also explain how fossils are made. Pretty good for a four-year-old!

I started by creating this Pinterest board dedicated to her party and collecting ideas from the NUMEROUS dinosaur parties out there. There were so many wonderful inspirations. I wasn't able to use them all but it was a great springboard for making her party unique.


Birthday Outfit


I took Elena with me to pick out the fabrics for her birthday outfit. I gave her some peramiters and let her give me suggestions/tell me what she liked best (if you read my earlier birthday post, you know how opinionated she is getting about what she wears). She found some orange dot fabric, the green fabric that I also used for some other party favors, and fixated on a pink ruffle fabric that was WAY too pricey. I told her no on the pink until I found a remnant that was marked down because of a pull. I found a hot pink T shirt at the Dollar Tree and used this adorable dino alphabet to applique her shirt with the green and orange fabrics. I also used the green to make her pants with the pink ruffle around the base of each leg. She has insisted on wearing this outfit almost every day since her party (we've washed it almost every night). It certainly is not what I would have chosen, but she LOVES it, and that is what is important.


Location


Normally we have the party in our home, but I decided to investigate off-site locations because I knew we would be inviting more guests this year. I found the perfect location in our local Science Center. It was a beautiful facility that was the perfect size, educational, affordable, and provided the perfect community outreach that we like to include in our birthday celebrations. We are trying to teach our girls that it is better to give than to receive so we ask for donations instead of gifts. The Science Center provided us with a list of needed materials and guests were asked to bring those in place of presents (trust me, these girls have enough toys and clothes).


Decorations


Next, I decided to start with color choices. Elena has more friends that are boys than girls, but I wanted the party to have a girlish feel. I chose lime green, hot pink, and bright orange. Polka-dots, tulle, and ribbons increased the girly feel. I always like to have the personal touches with names & birthday wishes, and enjoy any opportunity to use my design skills, so I make my own party printables. I designed her invitation first. The simple dinosaur silhouettes were from a free dinosaur font download.


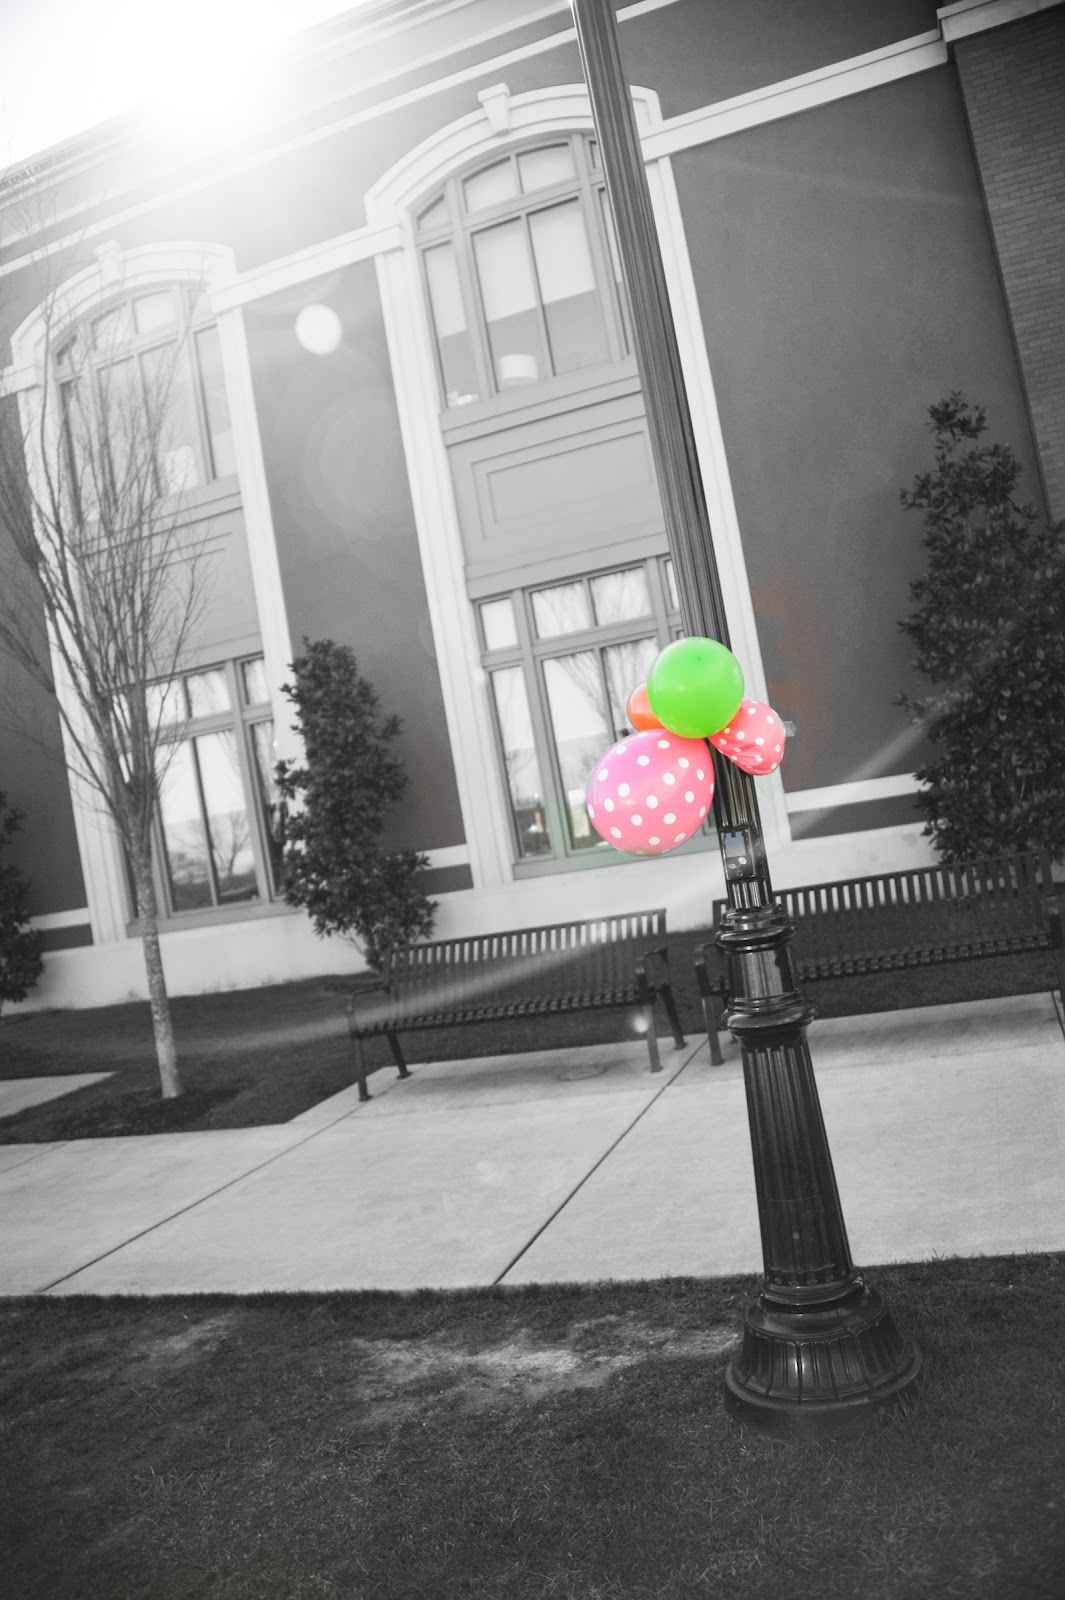
The Science Center is located in our "Cultural Center" along with the local ballet, artist guild, and symphony offices in a group of three buildings. Finding the location can be a bit of a challenge if you've never been there so I used  hot pink polka-dot, orange and lime balloons outside and inside to direct guests to the right location.


I also posted a sign on the door with further directions. It read "Stomp Rumble and Roar! Elena's party is on the second floor. Track the Dino Prints through the door.


Using my Silhouette Cameo, I cut out small dino foot prints which I taped to the floor creating an obvious path to the Science Center.


Using the same stripe and dinosaur elements from the invitation, I added a polka dot background to pink and orange to create coordinating cupcake toppers, food labels, party hat labels, table centerpieces, favor toppers, dino dig labels, etc. Since helium was not in our budget, I wanted to come up with a creative way to use the pink polka dot balloons in the party room. The day before the party, I made the impromptu "balloon topiaries" for centerpieces on the table (you can see my tutorial on how to make them here).


Party Favors
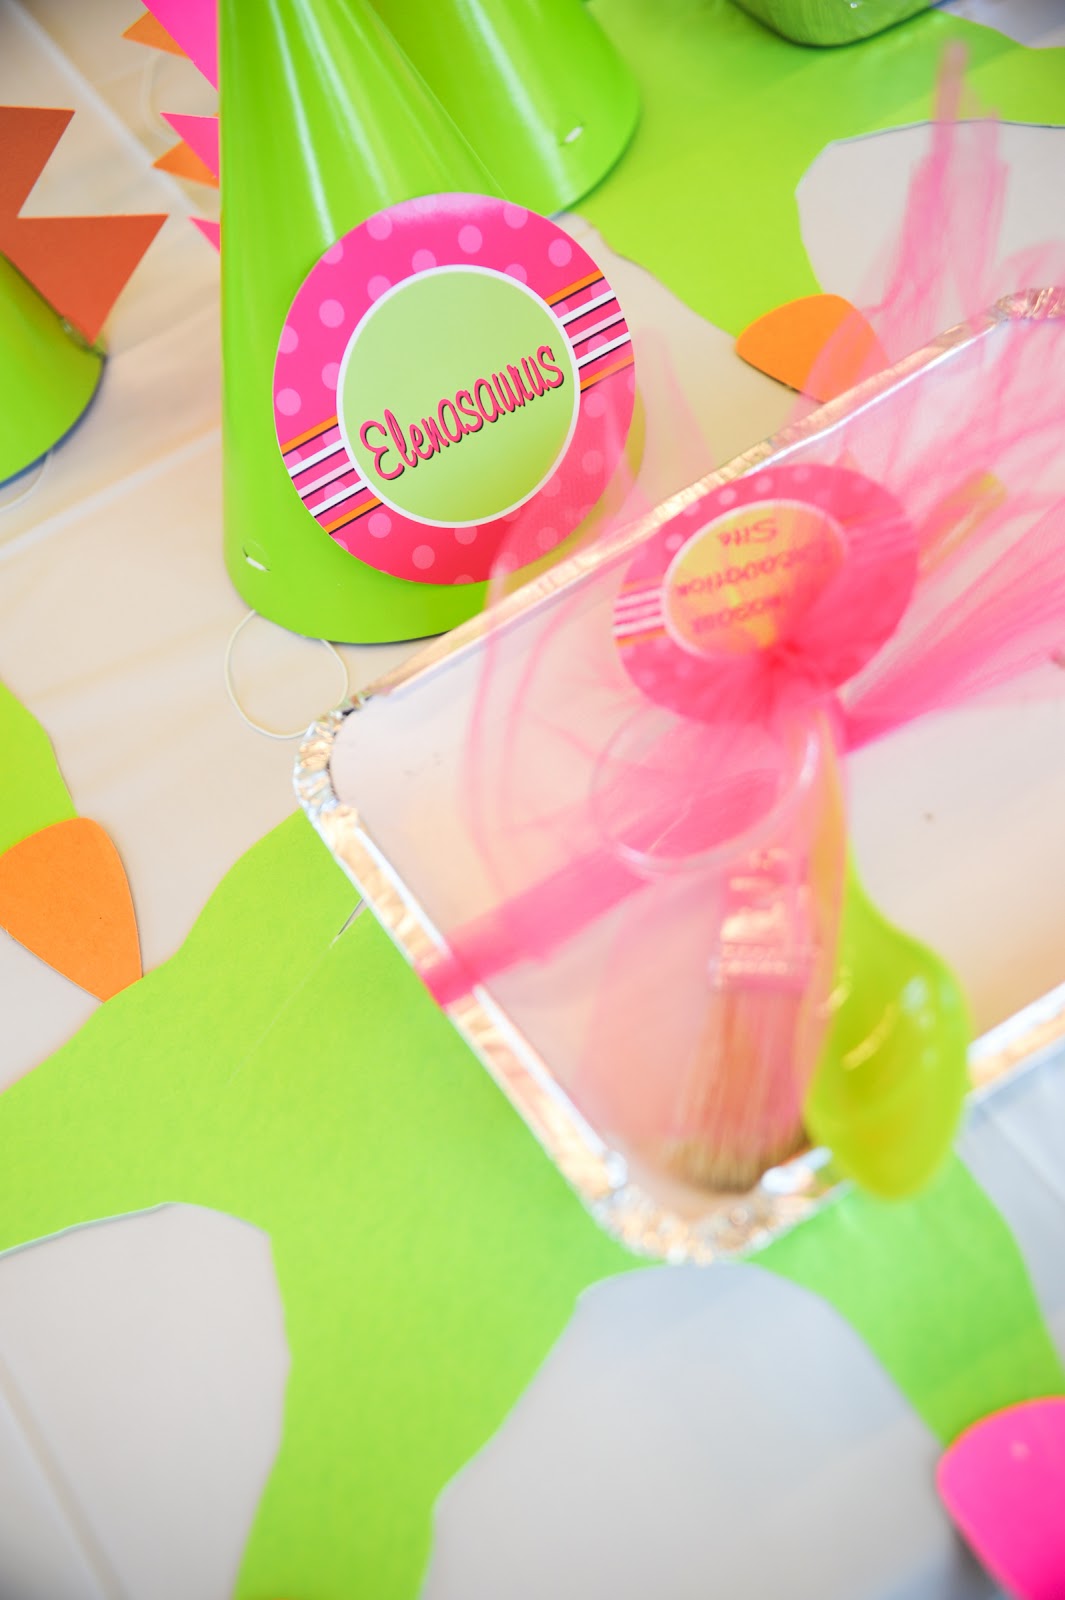

The main party activity also served as a party favor. Each guest had their own dinosaur excavation site which included "paleontologist tools," a dinosaur skeleton to excavate and a dinosaur fossil to keep (you can see my earlier post about how to make your own here).  Each guest also had a few other special treats to take home with them. I knew the instant I saw this post that I HAD to make dino tails for Elena's party! Using a lime green fabric I found at JoAnn on the clearance table, I made 20 tails (total cost to make all 20 was about $30)The girls' tails had pink spikes and the boys' tails had orange. It took me the better part of two days to make them but it was well worth every bit of the effort when I saw how much everyone enjoyed them.


I also used my Siloette Cameo to cut out dino feet that slipped over their shoes. I cut out matching pink and orange claws for the tips to coordinate with the tails.


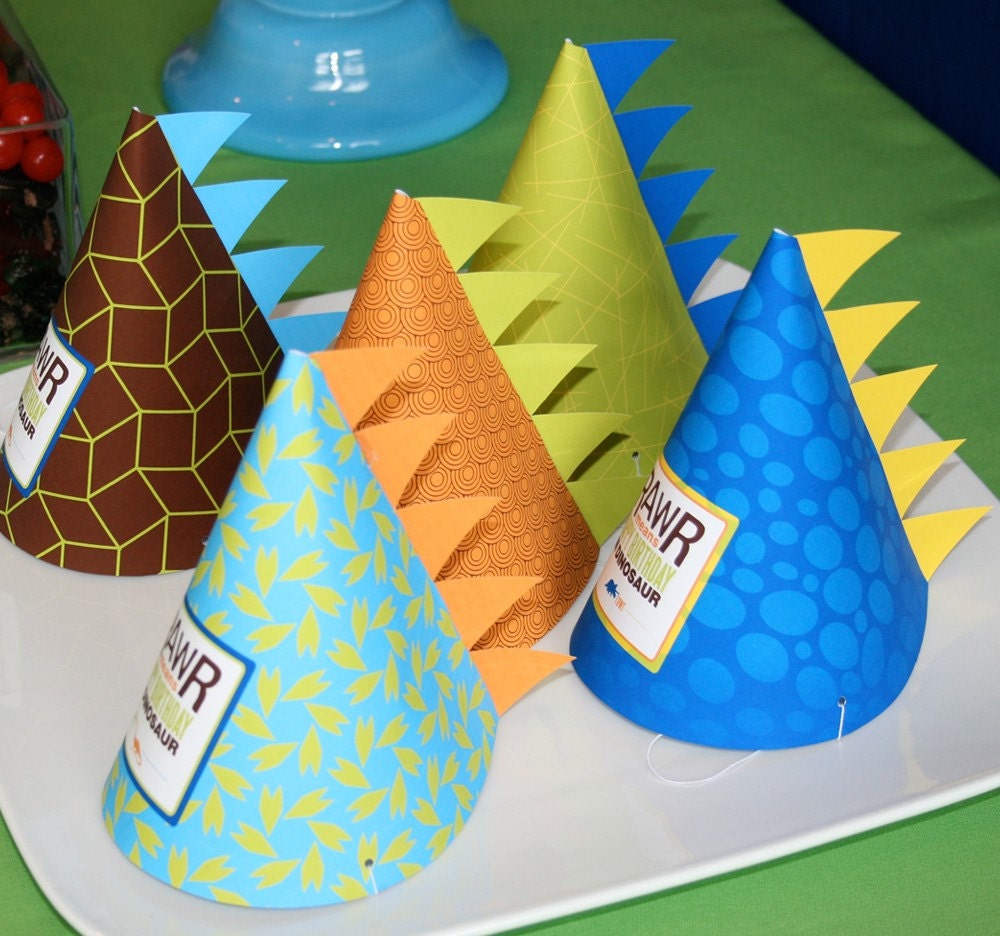
To top off the dino set, I was inspired by this find on Pinterest. I purchased solid green party hats online and added the pink and orange spikes to the back. Each hat had a guests "dino" name on the front and these were also used as place cards at the tables.


I also had to include dino eggs. Elena helped me sort some Easter candy so we had only pink and white eggs to match her decor. I made simple toppers for small ziplock bags and put a handful in each container.


Finally, we continued our magnet tradition where each guest was given a "Thank You" magnet with Elena's picture. It has been neat for us to see how she has grown each year through this little memento.


Agenda

The first 30 minutes of the party were spent enjoying the facilities at the Science Center. From the live animal exhibits to the hands-on experimenting exhibits, there was plenty for them to do. I was a little afraid that some of the exhibits would be over their heads, but they seemed to enjoy it all!


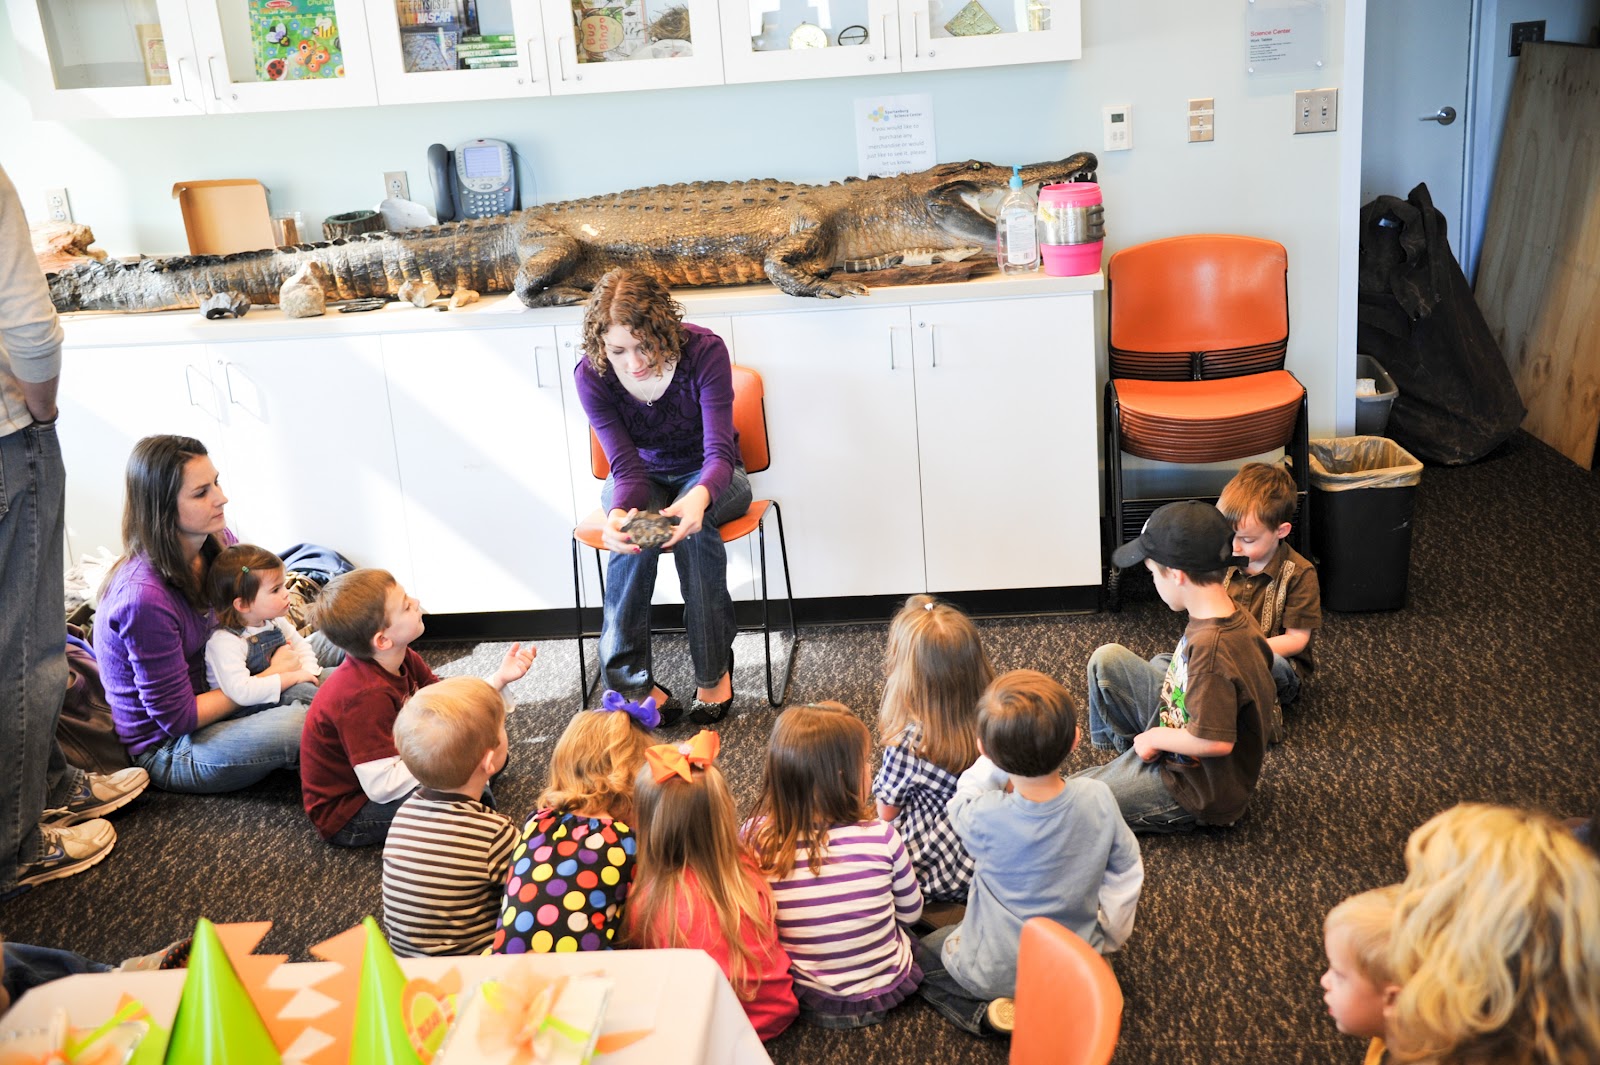
Next, everyone gathered in the party room where a sweet intern delivered a quick lesson on fossils. She passed around actual dinosaur fossils and talked with them briefly about how fossils are formed. She then explained what a paleontologist does.


Then, the kids moved to their seats at the table where I had their dino-digs waiting on them. After some brief directions, they dug up their dino bones and discussed with their parents what dinosaur they had discovered.


We poured the extra sand into buckets and it was used for the turtles living in the science center. I had bags prepared for the guests to carry their dinosaur bones, fossils, and tools home with them so they wouldn't get sand all over their cars (as a mama, you try to think of those things).


The kids then put on their party hats, dino tails and feet, and gathered around the intern once more to see, touch, and hold a live snake (a special request by the Birthday girl) while the parents cleaned up the table for food.


After singing Happy Birthday to Elena, the food was enjoyed and more fun was had exploring the exhibits and dancing in dinosaur regalia.


The Menu


The party was held from 10-12 so I planned a light lunch. I started with the "Herbivore" food and served a Mandarin Orange Salad and a Lime-Kissed Fruit Salad (though I forgot the honey and it ended up just being fruit salad). The salad containers were Walmart finds that I am sure I will use time and time again.


Next came the "Carnivore" food which was Publix party platters. We served ham & cheese roll ups and pizza roll ups. For the "Watering Hole" I made my Sparkling Strawberry Punch and labeled small water bottles. I purchased lime green cups and made coordinating stickers for each cup. Each cup and water bottle had a place for guests to write their name so drinks weren't mixed up or discarded prematurely.


Finally, for desert, I made strawberry cupcakes and vanilla cupcakes with cream cheese icing. I made the cupcake wrappers and toppers using my Silhouette Cameo.


When Elena caught a glimpse of the cake on the site where I got her cupcake recipe, she insisted on a "rose" cake for her party so that is what she got!


Keep checking back in the next couple of weeks...once I get my computer out of the shop, I hope to post some FREE dino party printables as well as my designs for cutting out the dinosaur feet and cupcake wrappers via your Silhouette Cameo!

FREE Silhouette Files:

Four Years ago...

Pin It

On March 11, 2008 our lives changed forever. Elena Nicole Lowery came into this world and we haven't been the same since. This little girl forever amazes me:

  • She loves: dinosaurs, trains, playing T-ball with Daddy, watching Star Wars, digging in the dirt and building things.
  • She must sleep with "Bear, Ted, & Doll" every day at naps and bed time
  • She does her chores willingly most days (except for cleaning up her toys)
  • She dresses herself in the mornings and is very decisive about what she will or will not wear. Her Daddy says that she is opinionated like her Mommy with the fashion sense of her Daddy...not a good combination!
  • She is an independent little soul. Whether she's entering her Sunday school room or visiting a new play ground, she enters the place as though she owns it.
  • She approaches every task with intention
  • She is a perfectionist about some things and gets very frustrated when she can't make things work EXACTLY how she thinks they should be
  • She LOVES tying knots (and has tripped up Mommy on more than one occasion with her "webs"
  • Though she's outgoing, she is cautious about more physical activities like slides, tumbling, swinging, etc.
  • She enjoys ballet but I learned the hard way that she's a bit modest...she didn't want to go for the longest time because she was "showing her underwear." After purchasing a pettiskirt, she hasn't complained once!
  • She knows more things about dinosaurs than I do (and I LOVED them when I was little)
  • She loves to learn new things and is starting 4K in the fall
  • She is a loving big sister (MOST of the time)...the words "Come on, Kate!" ring through our home all day
  • She's SO easy going (as she has always been). She didn't even cry yesterday when she got her 4-year shots! At times my mother's heart worries about her bottling up her feelings.

All about Elena in her own words via her Yearly Birthday Interview
(you can see last year's interview answers here):


My favorite color is...yellow
On TV, I like to watch...Word World
My favorite book is...The Easter Story (from her children's Bible)
My favorite movie is...Star Wars
I like to eat...chicken & rice
I feel happy when...I eat doughnuts
I feel sad when...Kate pushes me (yep, her little sister is already showing her who's boss)
I like to...climb up trees
I don't like to...eat onions
I think Daddy is...special
I think Mommy is...so pretty (melt my heart)
I think Kate is...really happy
I think Georgia (our dog) is...funny
I think Gracie (our cat) is...happy
I like to play with...Grandpa
My favorite toy is...my train set
I am really good at...playing with toys
I get excited...when a train comes by
I like to go to...Hobby Lobby (that's my girl for the second year in a row!)
My best friend is...Averi & McKenna
I love...my bears (that she sleeps with every night)

I thank God each and every day for choosing me to be her mother. What a precious child and an amazing responsibility He has given us as parents. I pray that I would live each day showing her the love that He has for us and what a jewel she is both to her family and her God. 

Tuesday, February 21, 2012

DIY Dino Dig Kits

Pin It We're getting all geared up for Elena's big 4th Birthday bash early next month. When asked what kind of party she wanted this year, there was absolutely no hesitation before her emphatic declaration..."a DINOSAUR party!" (which was a good thing, because Mommy had already created a Pinterest board dedicated to her 4th birthday dinosaur party).


I knew that I wanted to do a dino dig but we scheduled the party at our local science center. We needed something portable, individual sized, and a dig that would take no more than 20 minutes (due to the other activities they had planned and the attention span of our age group). I found some really neat kits at Oriental Traders but after reading the reviews, I realized it might be too time consuming and challenging for 3-5 year olds (plus the price didn't exactly fit into my budget).

I began my search for the perfect DIY kits online. I found some great resources for DIY fossils but I wanted the kids to leave the party with more than an imprint of a dinosaur skeleton (that's not as much fun to play with as a dinosaur action figure). I also wanted the dig to be a bit more authentic than just sifting through a bit of sand to find a plastic dinosaur. I found a great recipe for treasure stones, but I liked the idea of being able to use a brush to clean the surface of the bones and I didn't think the doughy consistency of the treasure stones would have the same effect. I even found a dino excavation cake that I considered doing. There were a few sites that had directions for plaster dig kits, but once again, that activity wouldn't fit within our time frame and could be a bit more of a challenge for little hands.

Finding no results I was completely satisfied with, I decided to combine several of the ideas I discovered into my own version of a dino dig kit. At best guess, they ended up costing just over $2 each.

THE TUTORIAL:

Materials:
Miniature dinosaur skeletons from Amazon (12 for $9) I have since found similar ones in 2 packs at Dollar Tree
Small aluminum baking tins (Dollar Tree purchase three for $1)
Salt dough (see recipe below)
Digging tools (see list below for what I included)
Printed dinosaur cards from Dinosaur Train's Field guide

I started with a simple salt dough recipe that I modified a bit for my needs. One batch made enough for two tins.

Ingredients:
1/2 cup salt
1/2 cup play sand
2 cups all purpose flour
1 cup luke warm water
1 heaping Tablespoon dried, used cofee grounds
2 drops each of red, yellow, and blue food coloring

Directions:
1. Preheat oven to 300
2. In a large bowl, mix flour, salt, sand, and coffee grounds together until combined well
3. tint water with food coloring to get a brownish color (it will look more purple but turns out to be more brown when combined with the other ingredients)
4. Gradually mix in the water (you may only need 3/4 cup because you don't want your dough to be too wet)
5.With your hands, form a ball with your dough and kneed it for at least 5 minutes. The longer you kneed your dough, the smoother it will become.
6. Divide your dough into two even balls and roll out each to about a 1/2" depth, about 4" x 6.5" (the size of the bottom of the tins)
7. Place the dough in the bottom of the tin and press a dinosaur skeleton into the dough until you get a nice impression of the dinosaur (I rocked it back and forth to make sure all of the skeleton appeared in the dough).
8. Bake for about 1 hour or until dough becomes hardened (do not over cook because the dough may begin to shrink)
9. Remove from oven and let cool slightly.
10. When dough has cooled a bit but is still somewhat pliable, press the dinosaur back into the mold just to insure that the dough doesn't shrink too much as it cools.
11. Allow dough to cool completely.
12. Cover over the top of the dinosaur and dough with play sand.


After the dig, I plan to have bags for the kids to put their "kits" in if they want to take them home and enjoy them again, with or without the dinosaur skeleton. I love that it will function both as an activity at the party and a favor.

I also wanted the kids to know exactly what kind of dinosaur they unearthed, so I found FREE printable information cards on the Dinosaur Train website. I found matches to all of the skeletons and glued the cards to the lid on the inside of each tin.


Next I tied up each tin with pink and orange tulle (that matches our color scheme) and printed out color-coordinating tags the read "Dinosaur Excavation Site." I also tied their excavation tools to the top with the tulle.


Excavation tools included:
Plastic Spoon for digging
1" brush ($0.59 each from Joann)
Small Magnifying Glass ($0.35 each from Party City)
Bamboo Fork (75 for $1 at Dollar Tree)
Bamboo Pick (25 for $1 at Dollar Tree)


Keep your eyes pealed because I am sure I will be sharing more details to her party as the date gets closer like the party hats, dino tails, and dino feet as well as cupcake decorations, menu items and invitation design! This Mama LOVES to plan a party!


Thursday, February 9, 2012

3+2=5 Ye of little faith...

Pin It

We've known since November, but just announced to the general public a couple of weeks ago...August 6th (or based on our previous two experiences late July) we will be adding a third and final little one to our family!  Knowing this is likely the last time I will experience the joy of pregnancy and delivering a new life into the world, I started a pregnancy journal early on (something I thought of doing with both girls, but neglected to do for whatever reason). I looked back on some of my early entries today and it hit me square in the face how little faith I have sometimes. Here is the first excerpt from my journal, right after we took the first pregnancy test:

We went back and forth for SEVERAL months discussing whether we wanted a third child, what practical differences it would make in our daily life, would we be able to provide for three in college and school, etc., etc., etc....Patrick was worried about being an old father and I somehow never imagined that Kate would be our last baby, but we both agreed that if we had a third, that would be it for us. We finally agreed that three would be a good number for our family and felt that God wouldn't put the desire in our hearts if it wasn't within His will. As teachers, we saw first hand the benefits of siblings who were closer in age so we knew that we didn't want the baby and Kate to be three years apart in school. With that knowledge, we decided to start trying in May or June.

With Elena and Kate, we were successful on our first and only try each time so when we decided to start trying for number three, we assumed it wouldn't be any different. We were wrong. After five months of trying and no success, we started believing maybe we were wrong, and God didn't intend for us to have any more children. We decided to give it one more month of trying and we began to prepare ourselves for the reality of only having two children. We were beginning to accept the idea and I didn't want to get my hopes up again, so I waited to calculate a possible due date and take an early pregnancy test until that "P" date on the calendar. I didn't want to hope, but with my first two babies, I remember one of the very first signs was thirst. For a few days I had been craving ice water and guzzling it by the glass fulls. I honestly chalked it up to the fact that I had been doing some work outside and a lot of dusting (yet again, I didn't want to get my hopes up). But finally, on the night before the big "P" date on the calendar, I asked Patrick if he thought I should take a test the next morning. He asked if it would be accurate and I told him I thought it would.

November 27th, 2011:
I woke up having to use the bathroom so I lay in bed for a while trying to decide if I wanted to take the test. I told Patrick I had to go and asked him if I should test. He said go ahead. I went in the bathroom and took the test. I tried to keep my eyes closed and count the three minutes you are supposed to wait but of course I couldn't wait. I think I made it to 46 seconds before taking that first peek. Totally expecting to see a single pink line instead of two (as had been the case month after month before) I was shocked to see a VERY faint pink line next to the darker one. The first word I uttered was a very soft "baby" which then turned to a second louder "Baby" and finally a third loud "BABY!" I felt warm all over, weak and shaky. I showed Patrick and he didn't see it. We turned on more lights and he asked "Isn't it supposed to be darker than that?" I told him that it didn't matter how light or dark, a second line meant we were pregnant. We spent the day thinking about how our lives would change and re-adjusting to the idea that three was indeed a good number.


Isn't it just like our Lord to place a desire in our hearts, then wait until we completely let go and humble ourselves before Him to answer those long-awaited prayers? We know of so many who tried and tried and could not have children, or struggled for YEARS before having a child. Here we were with two beautiful, healthy girls. Who are we to question God and His perfect timing? I write this now as a reminder to myself in those times when I lose faith, or try to take control of the situation myself, that no matter how hard I try, HE is the one in control and HIS timing is always perfect. I need to trust Him even when I am in the "thick of things" and don't understand.


Friday, January 6, 2012

My little Dinosaur-lovin' Ballerina

Pin It

I love that my girls seem to be well rounded. On the top of their Christmas list this year was a train set and Toy Story action figures. Though there were a few dolls in the mix and some new clothes, by far their favorite has been the train table mingled with the bucket of dinosaurs. They have spent hours having the dinosaurs attack the trains and having Woody and Buzz come to the rescue.

Elena Showing off her new pose


As a little girl, I always dreamed of taking dance lessons. Elena has always enjoyed moving to music and she is finally old enough, so we signed her up. Part of her Christmas was a semester of lessons, ballet shoes, tap shoes, tights and leotards. With all her interest in trains and dinosaurs lately, I was concerned about her losing interest in dance but lately her motivation for remembering to always use the potty has been dance class. She's been so excited all week and keeps asking when she gets to go "do ballet."

Showing Kate what she learned


Yesterday was her first class (and though I was less than happy with her ability to follow directions in the portion of class that I observed) she LOVED it! Her biggest complaint was that she had to leave and unfortunately, she kind of took it out on her instructor by pouting on our way out and refusing to say "thank you." I guess it could have been worse. There are five little girls in the class and I couldn't feel more blessed to start her out with Palmetto En Pointe and their dear, sweet instructors. I just know she is going to have a positive experience and develop a love for dance and movement for years to come!

Sunday, January 1, 2012

Happy New Year!

Pin It Just wanted to wish everyone a Happy New Year! My first resolution is to try to do a better job keeping my blog this year. Pray you all have a happy and blessed year.

Wednesday, December 7, 2011

Creating our own Christmas Traditions...to Santa or not to Santa?

Pin It Long before our girls arrived, Patrick and I would sit and discuss the Christmas traditions that we grew up with and dream about how we would make the season special for our children. Our common wish was that we remember the true reason we celebrate and not get too caught up in all of the glitz and glamour.

Our most current family photo

We both grew up believing in Santa. We remember the excitement of setting out cookies for Santa and waking up to a bunch of presents around the tree and filled stockings. Our relationship with Christ did not suffer as a result but personally, we struggle with the idea of telling "white lies" to our children. Maybe it's a little bit selfish on our part because we don't want to deal with the guilt or maybe it's that we don't want to have to explain why some things we've asked them to believe in are true and other's are not. We even have a sweet little book (A Special Place for Santa) that my mom found for us. The book includes the history of Santa (his Christian roots and origin). In the story, Santa is concerned about taking away from Christ at Christmas: but, when I read it to the girls, I feel as though I could be leading them astray.

Admittedly, we're still on the fence about our "Santa" decision.


We have come to some conclusions:

-we're not telling the girls what they can and can not believe in

-we're going ALL OUT with Christmas decorations

Elena adding her 4th year ornament to the tree
Kate getting a good look at her 2nd year Christmas ornament

-we're hanging stockings as part of our decorations

-presents will still "appear" on Christmas morning
(though we're not telling them they are from Santa)

-traditional movies and "stories" are still O.K.
(as we're finding them very hard to avoid)
Sipping Hot Chocolate while watching the Polar Express
-most importantly, activities that focus on Christ and the Nativity are at the forefront every day


For now these activities are out:

-letters to Santa

-scheduled pictures with Santa

-cookies and milk for Santa

-purchasing an elf

We don't want to be scrooges or have children who are "know-it-alls;" who go telling all the other children in their classes that there is no such thing as Santa. We don't want to take the "magic" out of Christmas for our girls either. For the time being, we are just allowing them to assume that there is a Santa but we are not confirming that it's true. One of my dear college friends told me that is how her parents handled it. They never once told her there was a Santa but always stressed that she was allowed to believe in whatever she felt in her heart to be true. I always admired her strong family ties and most importantly, their family's devotion to Christ.

It is increasingly a challenge to avoid Santa when other children and adults are constantly asking that age-old question, "What is Santa bringing you for Christmas." When Elena says things like, "Santa is going to bring me a train set!" We reply with, "Do you think so?" and "Is that what you believe?" Ultimately our goal is for our children to be excited about CHRIST, always put HIM first, and remember that it was the tiny baby in the manger that gave us all we have.

Last year, I stumbled upon a book at Publix, Christmas Stories for Bedtime. I loved the way it took a new verse each night, explained it simply, and included a prayer and a song. It is a wonderful, sequential and Biblical way to share the Christmas Story (I hesitate to even call it a story when it is absolute TRUTH). This year Patrick and I sat down and picked out 25 of the 31 devotionals that we felt would have the most impact on our girls and I made ornaments to go with each one (I got the idea for the ornaments I made here).


Each day of December leading up to Christmas, we read the verse and lesson, pray the prayer (but make it our own) sing the song, and place our ornament on our special little tree. The book is designed for children ages 5-8 and even though Elena is only three, the Biblical truths are explained so simply that even she is able to understand. Elena LOVES putting the ornaments on the tree each night and we all enjoy singing the songs together as a family (and again throughout the next day).

I also found a wonderful FREE pre-school nativity pack. Elena (and eventually Kate) will do some activities during the day that relate to the evening lesson. As the girls get a little older, I would love to incorporate giving to others in need or an outreach activity for every day as well. Another fun tradition that we learned from a former Sunday School teacher of ours is purposely keeping the baby Jesus out of all of our nativity scenes (we have a few around the house) until Christmas morning. The first thing we do on Christmas (even before presents and breakfast) is read My First Story of Christmas which ends with the following powerful statements:

"Each year we remember that first Christmas, when Jesus was born in a stable. We give each other presents, just as the wise men gave presents to Jesus and just as God sent Jesus as the best gift of all."

After reading this and praying together, we place the baby Jesus in the manger scenes as our first "gift" of Christmas. Then we begin the fun of opening presents and playing together as a family.


Here are some other great ideas I have found for keeping Christ the center of Christmas with your kids:
Daily Scriptures and Crafts
Gingerbread Nativity
Similarities between Santa and Jesus
Online Christmas Coloring Book

Some great links my dear friends and family sent my way after I posted this:
FREE Jesse Tree Family Devotional-if I had seen this before making my ornaments, I think I might have gone this route instead. I love how there is an "outreach" included in every day's activities. We will probably be doing this devotion when our kids get a little older!
Who is St. Nicholas?-a great online resource that explains the Christian origin of St. Nicholas.

I would LOVE to hear other believers' Christmas traditions. Please share your ideas, suggestions, etc.

Monday, August 15, 2011

Ponies, Pillows and a Parachute

Pin It

I know it has been FOREVER since I posted, but today the hubs went back to work and I guess I kind of did as well. Last week I saw an amazing idea on Play at Home Mom's blog and I knew we MUST try this. Well, completely on accident last night, Elena went digging through some of my old teaching supplies and re-discovered my 16-person parachute. We began playing with it (as best we could with one adult, one 3-year-old and one 16-month-old). We have a box fan at the entrance to our playroom (since it's a lot warmer than the other rooms in our house). Quiet by accident we discovered that our little box fan, a few close walls, and the parachute create the perfect bubble hut!


We played in it for a while last night before dinner time. Of course, first thing this morning, Elena was asking for the parachute again. This time we set it up in the hallway between the girls' rooms. They immediately began filling it with pillows and of course the ponies had to get in on the action.


It's not a "bubble boy" bubble, but it ended up being a lot cheaper for us with no trip to Lowe's.  I have a feeling we'll be doing this a lot in the coming winter months!