Wednesday, December 7, 2011

Creating our own Christmas Traditions...to Santa or not to Santa?

Pin It Long before our girls arrived, Patrick and I would sit and discuss the Christmas traditions that we grew up with and dream about how we would make the season special for our children. Our common wish was that we remember the true reason we celebrate and not get too caught up in all of the glitz and glamour.

Our most current family photo

We both grew up believing in Santa. We remember the excitement of setting out cookies for Santa and waking up to a bunch of presents around the tree and filled stockings. Our relationship with Christ did not suffer as a result but personally, we struggle with the idea of telling "white lies" to our children. Maybe it's a little bit selfish on our part because we don't want to deal with the guilt or maybe it's that we don't want to have to explain why some things we've asked them to believe in are true and other's are not. We even have a sweet little book (A Special Place for Santa) that my mom found for us. The book includes the history of Santa (his Christian roots and origin). In the story, Santa is concerned about taking away from Christ at Christmas: but, when I read it to the girls, I feel as though I could be leading them astray.

Admittedly, we're still on the fence about our "Santa" decision.


We have come to some conclusions:

-we're not telling the girls what they can and can not believe in

-we're going ALL OUT with Christmas decorations

Elena adding her 4th year ornament to the tree
Kate getting a good look at her 2nd year Christmas ornament

-we're hanging stockings as part of our decorations

-presents will still "appear" on Christmas morning
(though we're not telling them they are from Santa)

-traditional movies and "stories" are still O.K.
(as we're finding them very hard to avoid)
Sipping Hot Chocolate while watching the Polar Express
-most importantly, activities that focus on Christ and the Nativity are at the forefront every day


For now these activities are out:

-letters to Santa

-scheduled pictures with Santa

-cookies and milk for Santa

-purchasing an elf

We don't want to be scrooges or have children who are "know-it-alls;" who go telling all the other children in their classes that there is no such thing as Santa. We don't want to take the "magic" out of Christmas for our girls either. For the time being, we are just allowing them to assume that there is a Santa but we are not confirming that it's true. One of my dear college friends told me that is how her parents handled it. They never once told her there was a Santa but always stressed that she was allowed to believe in whatever she felt in her heart to be true. I always admired her strong family ties and most importantly, their family's devotion to Christ.

It is increasingly a challenge to avoid Santa when other children and adults are constantly asking that age-old question, "What is Santa bringing you for Christmas." When Elena says things like, "Santa is going to bring me a train set!" We reply with, "Do you think so?" and "Is that what you believe?" Ultimately our goal is for our children to be excited about CHRIST, always put HIM first, and remember that it was the tiny baby in the manger that gave us all we have.

Last year, I stumbled upon a book at Publix, Christmas Stories for Bedtime. I loved the way it took a new verse each night, explained it simply, and included a prayer and a song. It is a wonderful, sequential and Biblical way to share the Christmas Story (I hesitate to even call it a story when it is absolute TRUTH). This year Patrick and I sat down and picked out 25 of the 31 devotionals that we felt would have the most impact on our girls and I made ornaments to go with each one (I got the idea for the ornaments I made here).


Each day of December leading up to Christmas, we read the verse and lesson, pray the prayer (but make it our own) sing the song, and place our ornament on our special little tree. The book is designed for children ages 5-8 and even though Elena is only three, the Biblical truths are explained so simply that even she is able to understand. Elena LOVES putting the ornaments on the tree each night and we all enjoy singing the songs together as a family (and again throughout the next day).

I also found a wonderful FREE pre-school nativity pack. Elena (and eventually Kate) will do some activities during the day that relate to the evening lesson. As the girls get a little older, I would love to incorporate giving to others in need or an outreach activity for every day as well. Another fun tradition that we learned from a former Sunday School teacher of ours is purposely keeping the baby Jesus out of all of our nativity scenes (we have a few around the house) until Christmas morning. The first thing we do on Christmas (even before presents and breakfast) is read My First Story of Christmas which ends with the following powerful statements:

"Each year we remember that first Christmas, when Jesus was born in a stable. We give each other presents, just as the wise men gave presents to Jesus and just as God sent Jesus as the best gift of all."

After reading this and praying together, we place the baby Jesus in the manger scenes as our first "gift" of Christmas. Then we begin the fun of opening presents and playing together as a family.


Here are some other great ideas I have found for keeping Christ the center of Christmas with your kids:
Daily Scriptures and Crafts
Gingerbread Nativity
Similarities between Santa and Jesus
Online Christmas Coloring Book

Some great links my dear friends and family sent my way after I posted this:
FREE Jesse Tree Family Devotional-if I had seen this before making my ornaments, I think I might have gone this route instead. I love how there is an "outreach" included in every day's activities. We will probably be doing this devotion when our kids get a little older!
Who is St. Nicholas?-a great online resource that explains the Christian origin of St. Nicholas.

I would LOVE to hear other believers' Christmas traditions. Please share your ideas, suggestions, etc.

Monday, August 15, 2011

Ponies, Pillows and a Parachute

Pin It

I know it has been FOREVER since I posted, but today the hubs went back to work and I guess I kind of did as well. Last week I saw an amazing idea on Play at Home Mom's blog and I knew we MUST try this. Well, completely on accident last night, Elena went digging through some of my old teaching supplies and re-discovered my 16-person parachute. We began playing with it (as best we could with one adult, one 3-year-old and one 16-month-old). We have a box fan at the entrance to our playroom (since it's a lot warmer than the other rooms in our house). Quiet by accident we discovered that our little box fan, a few close walls, and the parachute create the perfect bubble hut!


We played in it for a while last night before dinner time. Of course, first thing this morning, Elena was asking for the parachute again. This time we set it up in the hallway between the girls' rooms. They immediately began filling it with pillows and of course the ponies had to get in on the action.


It's not a "bubble boy" bubble, but it ended up being a lot cheaper for us with no trip to Lowe's.  I have a feeling we'll be doing this a lot in the coming winter months!

Friday, May 6, 2011

Pin It
Introducing my new badge! What do you think? Please bear with me as I switch over to my new look. I am excited about the clean, fresh appearance and may be changing more things in the next few days...also, I hope to have an exciting announcement in the next few days (no we are NOT expecting again!)

Tuesday, April 19, 2011

Kate's Garden Party/Bug-themed First Birthday

Pin It


My little Kate’s first birthday party was just as much fun for me to plan as her big sister’s third birthday party (if not more so). I wanted to try and use as much of the same items for Kate’s party as I did in Elena’s (to save a bit since they were so close together) but I wanted them to be totally different. Elena’s was more fun and whimsical but Kate’s was more sweet, sophisticated, and feminine. For Kate’s party, I started with her pet name that has kind of stuck: “Katie-Bug.” I had seen some adorable lady bug parties out there, but once again, did not want to go the traditional route. What started out as a bug theme, evolved into a garden party theme.

The color choices came next. The green gingham was a given since I had cut out table cloths, backdrops, etc. for Elena’s party. I also still had a good bit left over. I had a plethora of canning jars so I decided to use them again as well. I love Kate’s baby blue eyes, so I added baby blue to the mix and topped it off with simple white lace (since I also had a lot of lace and ribbon given to me by my grandmother). Green grass with butterflies and dragonflies completed the design elements.


I once again made four basic designs that I repeated throughout the different elements of the party: the number 1 in green gingham, a blue butterfly, grass and bugs and “Kate” with blue outlines/green gingham.


Since the theme was about gardens and growing, I included pictures of Kate, birth through 11 months on the front of her invitation.


I don’t know about you, but I have always had the toughest time trying to determine what to give a baby for their first birthday. I know that the babies will not remember the day, but I want the gift to be something special that they (or their parents) will enjoy. We had a very special gift given to us when Elena turned one: a tree to plant and watch grow as she grew. Thinking of that gift led me to the flower idea: I asked each family to bring their favorite perennial flower as their gift to Kate. With each invitation I included a business card insert that read, “Help Kate’s Garden Grow. As your gift to our growing girl, please bring your favorite perennial flower to plant in the Birthday Girl’s garden.”


Birthday Outfit
For the birthday dress, I used the number 1 design element on the front of her dress. The blue fabric was from a pillow case that I no longer used. I used the green gingham and some eyelet lace that I already had for trim. I also made the matching bloomers and a cute little bonnet. I’ll admit that this beautiful garden party got my ideas flowing. I followed her tutorial for this bonnet to complete the birthday outfit. At first I was a bit skeptical about putting her in a bonnet. Would she keep it on? Would it look too much like a costume? Would it be practical? She did tug at it a bit when I first put it on her, but once we were outside, she forgot she was wearing it and it protected her little head and face from the sun (not to mention the fact that she looked pretty adorable in it). To match the dress and bloomers, I pleated the ruffle instead of gathering it and added a bit of white eyelet lace to match as well. I also made her a bib to wear during her smash cake time. I cut the bib from the center of an old bath towel that was coming unraveled and bare in some places. Total cost for her outfit: $2 for a bit of extra lace on the bloomers and bonnet and $1.35 for the trim on the bib.


Menu
We actually had to reschedule the party due to several conflicts and some illnesses in our family so what started out as a light afternoon menu turned into a light lunch right after church. I served sub sandwiches, butterfly-shaped peanut butter and jelly sandwiches, lime-kissed fruit salad, a veggie tray, layered potato salad and confetti pasta salad with lemon vinaigrette dressing.


For desert I made vanilla pound cake cupcakes with cream cheese icing and my home-made vanilla ice cream (I'll try and post my recipe for this one later since I had several people ask for it). Using my four basic design elements, each cupcake was then topped with a cupcake topper that I made using my 2" scalloped-circle punch and candy sticks. Using this free template, I made cupcake holders from paper doilies.


I used the same dollar tree serving platters that I made for Elena’s party but with a fresh coat of blue paint to match the décor better. These were made using three round metal serving platters, two glass vases, a smaller glass bowl, and two foam rings. What I liked best about these creations was the ability to fill the glass vases for a special touch and versatility from party to party.


I used the same punch and design elements as on the cupcake toppers to make labels for the cups. Each guest wrote their name on their cup for identification. For the children, I purchased inexpensive cups with straws from Oriental traders and made my own inserts with their names to match the party décor. For the babies, I found sippy cups at the dollar tree. For personalization, I found a place online where you can purchase waterproof, vinyl, inkjet labels by the sheet. I simply printed out matching labels for the babies and put them on their sippy cups (though I'll admit, I wasn't happy with how the labels held up in the dishwasher). For beverages I served our version of sparkling strawberry limeade and iced cucumber water (water with slices of cucumber for freshness) in inexpensive beverage dispensers (I learned my lesson about using canning jars for the beverages at Elena’s party). These were inexpensive purchases from Walmart that I am sure we will use again many times.


I used the scallop punch and printed green gingingham papers to make the napkin rings for the cutlery sets. I used solid blue paper products and a few bunches of babies breath to complete the look for the buffet table.


Decorations
Since the party was outside, I didn’t go over the top with decorations. I put up a single canopy for the food table and “show and tell” table. I spent most of my time and effort putting together the display table with items from her first year. I hung various outfits and pictures from her first year on a clothes line as a backdrop to the table. Following the garden theme, I purchased inexpensive plastic pots that I painted blue and filled with green grasses. I then glued cardboard letters to dowels which I nestled in the grasses to spell Kate’s name across the back of the table.


The display table also featured various items with photos of events and happening from Kate’s first year. The photo frames were also dollar tree purchases. I just painted them blue to match. When I put out the basket she lay in for her first week photo shoot, I shed a little tear to think of how tiny she was, and how quickly our babies grow!


The gift table was probably my favorite element of the party. The centerpiece was a “tree” made from a fallen branch from our yard.


I simply painted the branch white, attached a few painted silk butterflies, and anchored it in a pot that I painted blue with lace glued around the base. We called this “Kate's Tree of Future Hopes and Dreams.” Each guest removed a metal plant tag from the tree and wrote a wish or prayer for Kate’s future on one side and their names/their plant name on the other. We placed the plant tags with the plants in her garden. I know that these will be special keepsakes that our family will treasure every time we visit Kate's garden in the years to come. She will always know how special she was and is to the families that came to her first birthday.


I made simple centerpieces for the tables using canning jars, a small amount of lace, babies breath, and butterfly images. I also had folding fans just in case it was warm out (it was perfect weather so we ended up not using them). On the kid table, I had bug boxes as place-cards. I purchased the bug boxes online for $1 each then spray painted them to match the décor. I made simple name tags that I tied on the front of each box with blue ribbon and lace.


Activities
Since the party was held outside, in our back yard I had everyone park on the street. I used sidewalk chalk to point everyone in the right direction, down our driveway rather than through the front door. Though I did manage to clean house a bit, I only opened the basement to guests for the bathroom and some play time in the playroom if needed.


As guests arrived, the kids played on our play set as the adults perused Kate’s show and tell table. Once everyone arrived, we had a quick prayer of blessing for the food and thanks for Kate’s sweet little life. We sang happy birthday to her. She of course had her fun smash cake experience then everyone enjoyed refreshments.


After eating, I had planned to gather everyone up to plant Kate’s garden and share our prayers for our sweet girl as we placed each plant, then send the older kids on a bug hunt with their bug boxes (we had purchased plastic bugs to hide throughout the yard), but since the party was rescheduled, and it was during nap time for most of the kids (including our own), we had to forgo those activities.


Favors
As party favors for the kids, I used large half-gallon canning jars for the containers (don't EVER do this if you're having an outdoor party on a day with any wind. The jars actually blew over and busted before everyone arrived). I attached blue card-stock butterflies to the top of wooden dowels with ribbons for butterfly wands and purchased dollar tree butterfly nets. I found an inexpensive butterfly party pack at Party City which I included. Finally, what outdoor party is complete without a little bubble fun, so each child got a dollar store bubble wand as well.


Each family was given a “Thank You” magnet with the same design as Kate's invitation.


The families also received a small packet of flower seeds for their own garden. I purchased the favor tins through Oriental Traders and made the labels from card-stock. Using the Avery round labels and scallop punch, I made planting and growing instruction labels that I stuck on the bottom of each tin.


The Garden
The following day, the four of us enjoyed some special family time planting Kate's little garden. We placed it in a sunny spot next to the girls' play set with the park bench from MaMa & PaPa so Kate can enjoy it each time she and her sister go out to play.


We have been so blessed by wonderful friends and family and a precious first year with our sweet baby Kate. We pray she will always know how truly special and loved she is and we look forward to watching her grow with her garden!


The DIY Show Off

Monday, April 11, 2011

My sweet Baby Kate is One

Pin It

I know every mother says this, but I can't believe it has been a year since our sweet baby Kate entered our lives. In a way it seems like she has always been a part of our little family and in another way it seems like just yesterday when she was born. I didn't know that two children from the same mom and dad could be so drastically different. Kate has given us a run for our money this first year: unexplained choking spells, a scary overnight stay in the hospital, gastroenterology appointments, allergist appointments, MANY sleepless nights and separation anxiety (SO attached to Mommy). On the other hand, she has brought us countless joys in her first year: cuddle times, first words (it helps that "Ma-ma" was her first), nursing times, that first time crawling, sister time, and ALWAYS that sweet little open-mouth grin!

What an awesome privilege God has given me to be your Mommy.

I pray that you forever grow in His Grace.

I pray that you will grow to Love Him

I pray that you will grow to show His love to others

I pray that you will have all the joys your heart desires

I pray that I will always be able to guide you along the right path

I pray that you will always know how very much you are loved

I pray for His wisdom in raising you to be all that God designed you to be.


I never knew I had such a capacity to love. You and your sister have taught me so much about myself. With your birth, you fulfilled my dream of being a Mommy to two. With your little life you continue to fulfill dreams that I never imagined. I am soaking up this precious baby time because I know all too quickly you will no longer be my baby:


I love hearing you giggle at your sister when she plays peek-a-boo with you

I love how excited you get as soon as you hear Daddy's  footsteps on the front porch in the afternoon

I love seeing your face light up and your chunky hands clap when I sing to you

I love the smell of your baby breath when you attempt to give me a kiss with your wide-open mouth

I love the feeling of your little head burrowed into my neck when you are sleepy


You complete our little family just perfectly. You are your Mommy's joy, precious Kate!
I love you with all of my heart. Happy Birthday to my sweet baby girl.

Tuesday, April 5, 2011

Sparkling Strawberry Limeade

Pin It

We're getting ready this week for "Katie-Bug's" first birthday party. As promised (on my last post about a MONTH ago) here is the recipe for our Sparkling Strawberry Limeade. I first got the idea from Sonic. We have a Sonic a little less than a mile from our house and last Summer, I got addicted to their sparkling strawberry limeade. They stopped serving it over the winter and I immediately set out to try and re-create it here at home. After multiple attempts with various results (some complicated, some too sweet, some not "sparkly" enough) but not spot on results, my husband came up with this simple version that is our favorite:

1 12 oz. container frozen Minute Maid Limeade concentrate (thawed)
1 10 oz. package frozen strawberries (thawed)
1 1/2 liter chilled Lemon Lime Seltzer water (NOT lemon lime soda like sprite, it's too sweet)

We double or triple the recipe for parties. It has a nice balance of tartness, sweetness and sparkle. Let me know if you try it, what you think, and what variations/changes YOU like!

Sunday, March 13, 2011

Goldilocks and the Three Bears Birthday

Pin It

My little girl's third birthday party has been such a fun event for me to plan. I decided from the start that I didn't want to go a traditional route. I also knew that I didn't want people to bring gifts this year. Instead, we asked people to bring something we could donate to a local charity rather than rack up more toys than we know what to do with. The idea actually started there. My husband was concerned about Elena not understanding giving away the toys brought to her party, so we settled on a book donation. That lead us to think of some classic children's stories and since the celebration was for her third party, I tried to think of stories with the number three. We narrowed it down to "The Three Little Pigs" or "Goldilocks and the Three Bears." Since she has the prettiest blond locks, Goldilocks was our final decision.

Now came the color choices. My grandmother had given me an entire roll of green gingham fabric so this was my starting point. I also had a good bit of red fabric with tiny white dots left over from some previous sewing projects. I added what I call "Pepto Pink" to the mix and the color & fabric choices were complete. I was inspired by the colors and some design elements for this woodland fairy party. From there, I got the idea for her invitation. I used simple shapes to create the trees and took a picture of Elena with three stuffed bears to complete the personalization. I also made business card inserts asking for new children's books instead of gifts.


My favorite design element of the party was the three-bear design. I used this element many times including: cupcake toppers, address labels, book request cards, and the birthday dress. The birthday dress was inspired by some of the creations at this adorable etsy shop. Her dress turned out a little different since I did not use a pattern, but I was extremely pleased with the result. I also made the matching party hat with corkscrew ribbon to top it off.


The food choices were pretty easy. To go along with the Goldilocks theme, we had a brunch and served oatmeal with toppings for porridge, a fresh fruit salad with a honey-lime dressing, pigs in a blanket, and mini cheese souffles.


A birthday is never complete without cake so I made strawberry and vanilla cupcakes. I found the perfect cupcake wrappers in the valentines section of Hobby Lobby. I frosted the cupcakes with pink and white icing then sprinkled red, white, and pink sprinkles on the top. Each cupcake was then topped with a cupcake topper that I made using my 2" scalloped-circle punch, Avery 2.5" stickers and candy sticks. 


I used the same punch to make labels for the cups. Each guest wrote their name on the cup for identification. I served coffee, milk, orange juice, apple juice, and sparkling strawberry-limade (I plan to post our recipe for this one later since it was such a hit).


I found the cutest idea for kid drinks at this Goldilocks party. I purchased honey bear containers for less than $0.50 each and made them into sippy cups by cutting pieces of flexible tubing ($2 for 10' in the plumbing section of Home Depot) and threading it through the opening of the lid. I labeled each child's cup with their name. The kids got to take these home with them as one of their favors.


I also used the punch to make the napkin rings for the cutlery sets:


The cupcakes and food were served on dollar store serving creations. I hung the green gingham fabric as a backdrop for the table and used solid red and pink paper products. A few white daisies completed the cottage-type feel for the buffet table.


For decorations, I used white daisies in canning jars with red ribbon and balloons in red and pink throughout the house. I made several banners from the gingham, red polka-dot and pink fabrics to hang in various locations in the house. I also saw an adorable mantel decoration (I don't remember the site) and kind of made it my own. Each year Elena (and now Kate) get an animal from the Precious Moments train for their birthdays and I put a picture of Elena 0-3 in a frame with the animals in front. I then used the letters of her name to go in between the frames and hung a strand of the flag banner below.


My next concern was the activities. We knew we wanted to have the party at home, and with a bunch of three-year-olds, there needs to be some structured activities for the kids. Playing in the playroom and opening a bunch of presents was fine when she was one and two, but we definitely wanted something more to occupy their time; especially since we were not asking for gifts. I thought of going the traditional puppet show route, or doing some type of craft but I knew those things were not necessarily exciting for young kids (and wouldn't hold their attention for long) We had all the kids go to our play room and have free-play time until all of our guests arrived. Once everyone was there, we said the blessing and sang Happy Birthday to Elena. The kids then sat down at the kids' tables while the moms got their food ready. I made coloring books that told the story of "Goldilocks and the Three Bears" using coloring pages from Coloring Pages 24. I used the same design from her invitation for the covers and covered the crayon boxes with green gingham paper that I printed from my computer.


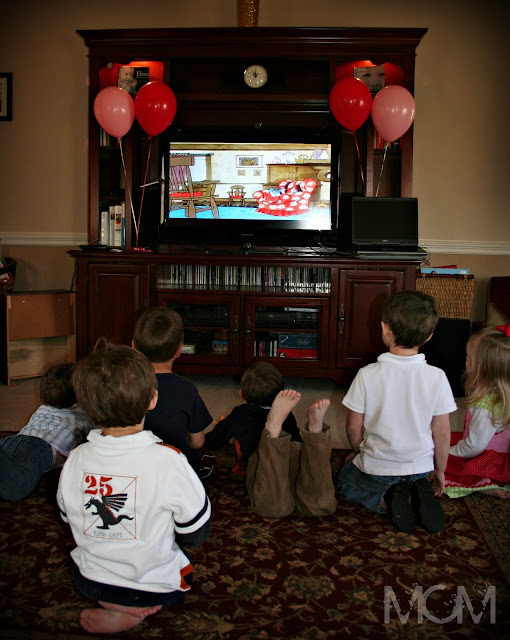
After eating, I had all of the kids move into our living room where we showed a short Goldilocks and the Three bears movie I found here on Youtube. We connected our computer to the TV and surround sound to view it. The parents were able to grab a bite while the short video held their attention.


After receiving a build-a-bear kit from Elena's Aunt Therese for Christmas, I had the perfect idea for the main activity. Each child could build their own bear! I purchased bears through a wholesale dealer for about $2 each. I removed the stuffing from the bodies of each bear and put the stuffing in individual ziplock bags. I sewed small stuffed hearts out of some scrap red fabric for each bear. I purchased some white, newborn-sized onsies (5-packs on sale for about $7) and made an iron on transfer (using transfer scraps that I already had on hand) for each child's bear that said "I heart (child's name)." I also made a small red bow to match and typed up a Birth Certificate for each bear.


It turned out to be a BEAUTIFUL day, so after the bears were complete, everyone took their new friends outside to play on our newly landscaped play set (complete with the trampoline that was her birthday present from Mommy and Daddy).


To continue our magnet tradition, I used the picture from her invitation to create the "Thank-You" magnets.


Each family received one of these as they left. We also passed out a little Teddy Graham Smore trail mix to each guest as they left. Elena enjoyed helping me put the bags together and we topped them with a simple card-stock "thank-you" note.


The day turned out to be just perfect! My girl felt very loved by all who came and I think everyone had a great time. It was nice having the bulk of the day left when the party was over to get the house back in order, and rest a bit before the time change. Thanks to all who came and helped to make our girl's special day even more special! 


The DIY Show Off